Friday, August 17, 2012
Happy Birthday Rocket!
What a great journey it's been. This is a layout of my Daddy when he was a little boy using Kasiercrafts ' Check In " collection. I adore this picture of him a little cowboy. The only difference now is he a bit bigger, but still that cowboy at heart. Today is his birthday and wish for him an awesome year, beautiful day and great overall birthday. I have to say he is the BEST!!!!
Oh and yes, Rocket is what we call my Dad, LOL!!! Have a great weekend everyone.
Wednesday, August 15, 2012
I love the way this flower turned out on this card. I created this for Prickley Pear Rubber Stamps and used their Hibiscus die and matching stamp set.
The center of the flower was created using a strip of paper, cutting a fringe edge, inking it and then rolling it up. I think it almost has a wood look to it....love it.
The center of the flower was created using a strip of paper, cutting a fringe edge, inking it and then rolling it up. I think it almost has a wood look to it....love it.
Monday, August 13, 2012
Get away with Check In
I loved this card I created using Kaisercraft's check in. It honestly is one of my favorite cards as of late. The roses were created using grocery bags and they are just beautiful. The colors are great together, the cluster in the bottom right corner works well and I like the sewing on the card. Love it.
I hope you do to.
Sunday, August 12, 2012
Antique Faux Ceiling Tile Tutorial with Pink Persimmon
Hi Everyone, today I have a great tutorial I came up with for making what I think looks like antique faux ceiling tiles. I hope you give it a try...so let's jump right in.
You'll need versa mark ink, embossing powder, sanding block, embossing folder, and solid core cardstock. The solid core is very important for when you start to sand...so be sure you choose the right paper.
Cover your entire colored cardstock with versa mark ink. Be sure not to miss anywhere.
Cover the entire piece with embossing powder and heat.
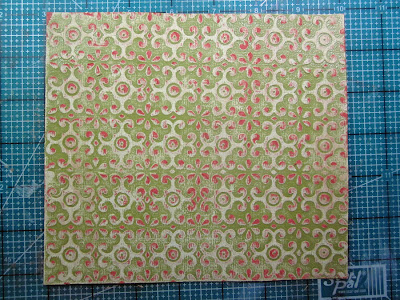
Once you have heat embossed then your ready to run it through an embossing folder. You can see where I have embossed half of the cardstock.
Use your sanding block on the embossed areas. You'll find as you sand you'll get three colors...the core cardstock, the embossed powdered color and the color inbetween. It makes for a lot of interest.
When you acheive the desired look then heat it once more with your heat gun to get the luster and shine back of the embossing powder.
Here is my finished project using the tiles as a background. The stamps are from Pink Persimmon...and they are beautiful.
Rose Ribbon Tutorial
2. Next start twisting the ribbon and curling it into towards the center. I like to use my pair of fine tipped tweezers to hold onto the center while getting it started.
Place the center start down in the middle of your glued circle and continue to twist the ribbon tight in some places and looser in others to add interest and adhere down spiraling outwards.
Here's your rose all finished wrapping...just tuck your end piece behind your ribbon. That's the great part about double stick ribbon.
Here is a finished tag showing where I used pearls in the center of the flowers to finish them off.
I used the Lakehouse collection from KasierCraft for this project along with their pearl brads...how I do love them.
Subscribe to:
Comments (Atom)


