Monday, December 2, 2013

A Gift for Faith


I made this for a sweet little friend of mine...Faith.  She just turned 12 so I thought she might like this plaque for her room.  I created this with the paper collection " Tea Break" from KaiserCraft.  I also had a ton of help from Stencil Girl stencils....Love the way the finish came out with them.  You can see a closer view in the picture below.  Awesome texture.


Of course, I had to add in some of my handmade flowers.  I created them with designer paper, ink them up with some pigment ink and then topped them off with a button and sparklet.  Overall I think it turned out really pretty with a lot of little details going on . 

Friday, November 29, 2013

The Floral Key Release from Heartfelt Creations


Today is the release of the much anticipated collection from Heartfelt Creations ..... Floral Key.  As always it deliver elegance and style.  Please be sure to check out Heartfelt's blog to see the rest of the design teams creations using the new release....STUNNING!!!!!  Below you'll find the complete tutorial and recipe for this card.  Enjoy!!!


Heartfelt Creations Products Used:
HCPC 3569 Burnished Key Precut Set
HCDP1 238 Floral Key Collection
HCD 741 Burnished Key
HCD 727 Vintage Floret
HCPC 3502 Mini Vintage Floret Precut Set
HCPC 3500 Open Vintage Floret Precut Set
119390136 3D Gold Stamp Paint
272484 KaiserCraft Daffodil Sparklets
1259723 Art Institute Glue Dries Clear
Other Products Used:
X-acto Tool
Foam Tape
Embossing Powder
Black Pigment Ink

Project Instructions
Cut base card 5 x 7.  Cut designer panel and cut out middle using X-acto tool as shown to create a frame.  Paint the corner flourishes with gold paint.  Set aside.  Cut two 5 x 7 light color designer paper rectangles.  Stamp the burnished key stamp on both using the pigment ink and cover with clear embossing powder, heat set.  Cut the keys/locks from one of the panels using the matching die.  Paint all the key die cuts (except the sentiment) with gold paint and wipe away excess paint.  Attach frame with foam tape to the solid stamped base as shown and also add all the gold keys/lock to the base with foam tape.  Attach the sentiment with a double high foam tape base.  Stamp the three smallest vintage floret petals on some of the darker designer paper using the gold stamp paint.  Cut out petals with matching die and curl and bend petals.  Glue and stack petals to create three flowers (2 larger and one smaller flower).  Finish off the center of the flowers with a sparklet.  Cut out leaves and love locket from the designer paper and add in a cluster as shown with the flowers.  Attach everything to your base 5x 7 card to complete your card. 

Wednesday, November 27, 2013

Love, Joy and Happiness Heartfelt Card


Hello everyone.  Today I'm featuring a Heartfelt Creations card I made but be sure to come back on Friday to see the Black Friday release from Heartfelt...it's gorgeous.  As always find the complete directions and recipe for the project below, so you can create your own. 


HCD738 Ornamental Add On Die, HCD722 Tattered Blossom Die, HCPC3494 Delicate Asters Stamp, HCPC 3468 Tattered Blossoms Stamp, HCDP 1237 Antiquity Paper Collection, HCD726 Delicate Asters Die. Other Products Used: Ribbon, Distress Ink, Liquid Pearls, Sewing Machine, Foam Tape, Dries Clear Glue, Card Stock, McGill Tools and Pad
Directions: Cut base of card 5 x 7 from the Antiquity Paper Collection.  Cut second layer from paper collection 4 3/4   x 6 3/4  and adhere to base.  Sew around the edge with sewing machine.  Cut 4 1/4 x 5 1/4 paper from collection and then cut out designer rectangle from collection (ink edges) layering on top of the 4 1/4  x 5 1/4 base.  Cut decorative ornament from Ornamental Add On Die.  Cut out sentiment from paper and layer on top of ornament.  Apply ribbon to the middle of your card with a bow at the base and then assemble card as shown with all the parts. 

Monday, November 25, 2013

Time to Give Thanks with JustRite


I haven't played along in a while with the JustRite challenge and this weekend I had some extra time that I got to.  The theme for this challenge was using the " bleach technique" .  I did the technique on my leaves.  I inked my paper with variegating  fall colors and then stamped using bleach and of course a JustRite leaf stamp.  I finished off my leaves by inking the edges with a darker ink.

I couldn't think of a better card to create for this week with Thanksgiving right around the corner.  I have to say I'm so thankful for so many things in my life.  Of course my boys and family, my job, the area I live in and the friends I hold dear.  I'm also thankful for each of you and thank you for sharing my artistic passion with me on my blog.  I'm one blessed girl.


Here is a complete list of JustRite products I used for this projects. 
 
 
Be sure to join in the fun of their challenges by clicking here. 

Friday, November 22, 2013

Sparkle Me This


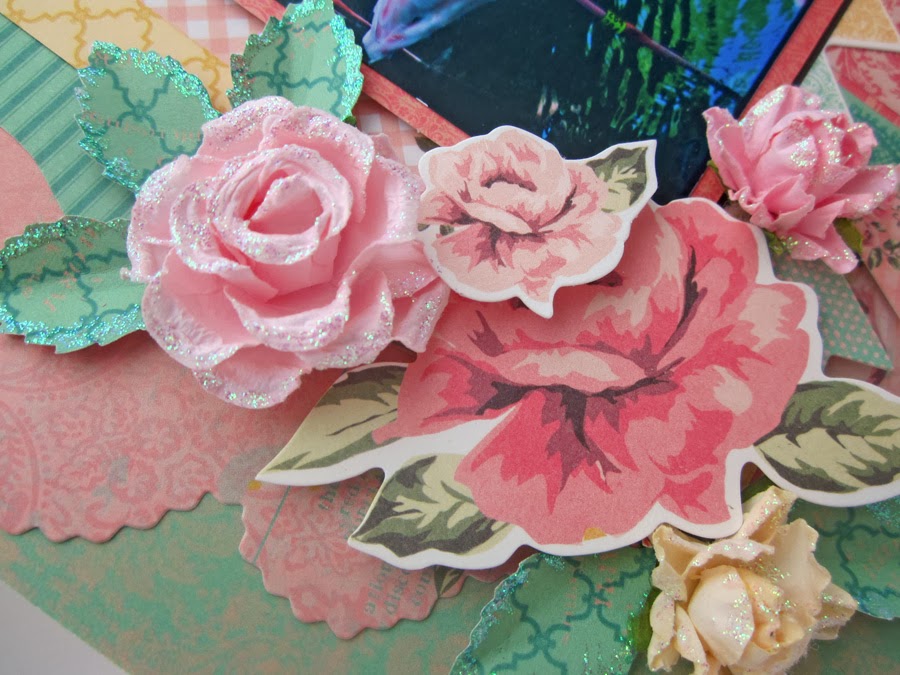
I thought I would wrap up the week with a layout I created for KaiserCraft using the Tea Break Collection.  I had this picture of the flamingos from the Animal Kingdom Disney Park and somehow they just seemed perfect for this collection.  Let me tell you, you might not be able to see it really good from the picture but man this layout twinkles.  I've added glitter to the flowers, leaves and also the fountain.  It's really pretty and sparkly. 


Have a great creative weekend and I'll see you on Monday. 

Wednesday, November 20, 2013

Moments with You Easel Card


I'm really enjoying Heartfelt Creations paper collections.  They are new since I was last on the time and OMGosh they are so wonderful to use with their stamps and dies.  It makes creating so simple and easy as everything coordinates. 

Want to know how I created this easel card?  check out the directions and the complete recipe of products below. 


Heartfelt Creations Products:
HCDP1 237 Antiquity Paper Collection
HCD729 Decorative Blossom Corner Die
HCD722 Tattered Blossoms Die
HCD736 Classic Leaf Die
HCPC3568 Moments With You Stamp
HCPC3546 Classic Leaf Stamp
HCPC3468 Tattered Blossoms Stamp
Black Gala Glitz
Art Institute Dries Clear Glue
Other Products Used:
Foam Tape
Xyron Creative Station 5" Permanent Adhesive
Pigment Inks: Hollyhock, Ruby & Blush
Tattered Angels Mist: Diamond
Card Stock :Green & White
Tweezers

Directions for Project:
Create base easel card, you can find the tutorial here.  For the top cut a 6 x 6 base designer card stock. Cut two Decorative Corners from the Antiquity Paper in black.  Adhere one into the right corner using Xyron adhesive.  Attach the second corner in the top left but just a portion as shown and snip away the excess.  Do this neatly as you'll use the other portion of the left over corner in the interior of the card.  Stamp and cut Tattered Blossom flowers in various sizes.  Ink with three different shades of ink with the lightest color in the center and the darkest on the edges of the petals.  With your tweezers wrinkle the edges of the petals and layer and glue together. In the center add a generous dollop of dries clear glue and finish flowers with gala glitz and spray mist.  Stamp and cut two leaf flourishes from the classic leaf stamp.  Arrange the flowers in clusters as shown on card and tuck in leaves (cutting some apart) as shown.  Fussy cut tickets from paper and add to the front to finish off.   

In the interior of the card cut 6x6 designer card base.  Cut your left over corner so it is balance and adhere with Xyron.  Stamp Moments with You sentiment and fussy cut out.  Adhere with foam tape and apply over the corner die to finish card. 


Monday, November 18, 2013

Mixed Media Mini Album


This is such a fun mini album I created for KasierCraft.  All the trinkets and ribbon hanging off gives it such interest.  The collection I used for this projects is Novembers release " Through the Looking Glass" and if you couldn't tell it was my favorite this month. 


I inked my handmade flower and then painted it with Ice Resin for a waxy look.  I loved the way the ink bled just a bit when painted, it really adds to the grunge whimsical feel. 


One more view of the flower as I really think it's the center piece of the project.  I'll see you on Wednesday with a Heartfelt project so until then.......:)

Friday, November 15, 2013

Life is? Layout


This layout was designed for KaiserCraft and one of their November Sketch Challenges.  Sometimes challenges are a great way to spark your creativity.  You have an outline to follow but still get to get those juices flowing.  Plus sometimes you might just win and lots of companies have prizes, like KaiserCraft.  They actually give a whole collection away that is valued at over $75, so it's fun and it can really bulk up your supplies.  Be sure to check out challenges, they're a lot of fun. 

This paper collection is from the Through the Looking Glass collection that was just released this month.  It's truly lovely.  See you next week and have a great weekend.

Wednesday, November 13, 2013

The Beauty of Heartfelt Creations


Today I'm thrilled to share a layout I created for Heartfelt Creations and I've fallen in love with this project.  I really love the way my handmade flowers blended with the fussy cut matching paper.  What a great clustering it made.  Please see below for a complete recipe and instructions. 


Heartfelt Creations Products:
HCDP1233 Sunkissed Paper Collection
HCD729 Decorative Blossom Corner Die
HCD734 Sun Kissed Fleur Die
HCPC 3533 Sunkissed Fleur Precut
HCPC3435 Feather Grass
HCPC3495 Bold Delicate Asters
HCD726 Delicate Asters Die
Gold Gala Glitz
Art Institute Dries Clear Glue
Zip Dry Glue
Other Products Used:
Super Fine Tangerine Glitter
Embossing Powder
Versa Mark Ink
Pigment Ink: Corn Blue
Distress Ink:  Peeled Paint, Crushed Olive
rub on numbers
Xyron foam glue tabs


Project Instructions:
Wet edges of designer paper with water and distress edges, back with darker color designer paper.  Fussy cut flower banner from designer paper and put aside for later.  Cut four corner dies backed up together creating a doily.  Glue to layout base with dries clear glue.  Stamp Love sentiment in top right corner of the base layout.  Glue picture down with foam tape and edge the bottom of the picture with the fussy cut banner/border mounted on high foam tape.  Stamp, emboss and cut Sun Kissed Fleur.  Ink from center of flower outward lightening the ink to the edges for a variegated color. Add Gala Glitz to the center of each of the flowers. Curl flower petals with tweezers.  Create 12 varying sizes of flowers as just described.  Stamp aster leaf and cut, once cut ink edges with darker green ink and curl edges of leaves. Arrange as shown throughout the cluster of flowers.  Fussy cut flower label from paper and add rub on numbers/year.  Attach with foam tape to complete the layout. 


Monday, November 11, 2013

This is Impossible....Only if you believe it is......


Happy Monday.  I thought we would kick off this week with a card I created for KasierCraft from the Through the Looking Glass collection.  I made the flower bases and then topped them off with some ink for blending and a mini bloom.  I think they made for a stunning array.  The single mini blooms were inked along the tips to give them a bit more pop. 


I'll see you Wednesday with a layout I created for Heartfelt and it's one that I'm sure you'll love, so be sure to hop back over then.