


Step 1: Fold over the printed tape so both sides have the
pattern.

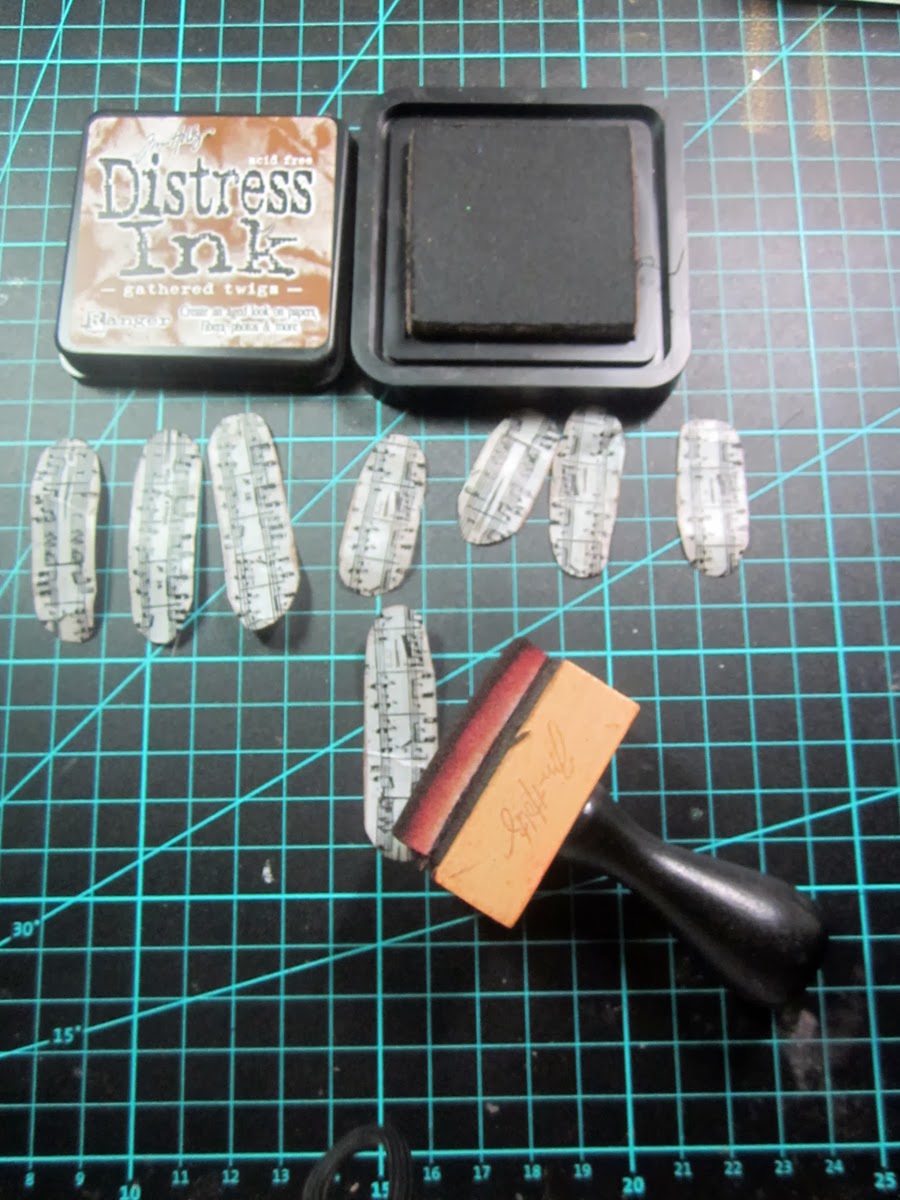
Step 2: Cut strips into a pill shape, rounding off the
ends.

Step 3: Ink the edges front and back of each petal
Step Four: pinch the centers together with tweezers for a
crisp pinch.

Step Five: Twist where you have the pinch, but be careful
not to rip your tape. The pinch in the
center actually helps the tape not to rip.

Step Six: Using glue does layer your petals up to create a
flower.

Step Seven: Finish off your flower with either a paper bloom
or even a sparklet.

Here’s a completed card that I used the latest collection “
Art of Life “ which blended beautifully with the printed tape flowers.

KaiserCraft supplies used: P1405 Printed Tape, F666 Black
Paper Blooms, F661 Mini Black Paper Blooms, P1407 Loved, Foam Tape
Other Products Used: glue dots, ink, card stock, tweezers


1 comments:
Wow! Another fun washi technique I will have to try!! Thank you for sharing!!
Post a Comment