

Today I'd love to share a quick tutorial with you that will help you make your flowers more realistic.
I created these flowers as a topper on my Home Sweet Home gift box. The paper collection I used is DCWV "Spiced Cider Stack". Just lovely for the fall season. Of course my Xyron glues helped me put it all together in no time.
So let's jump right in and see how to create these beautiful blooms.

Some of DCWV papers have a glossy finish and that is what I used on these flowers. The first step is to cut out flower petals. I used a Heartfelt Spellbinders die.

Turn the flowers over so the glossy side is down and spritz them with water. Leave them for a minute or so to let the water saturate the paper.

Using a fine pair of tweezers and your fingers bend and wrinkle each petal as shown.

Using a sponge dauber rub ink along all the folds, creases and edges of the petals. Your petals should still be a bit damp and the distress inks will bleed just a little bit, which is perfect.

Using McGill flower tools and foam pad and cup the center of your petals.

Be sure your petals are all dry. If they aren't you can dry them with a heat gun. Take Xyron's Adhesive Dots and place one in the center of a petal. Then adhere your next petal up and work upward until you have a full flower. The adhesive dots let you build a flower very quickly.
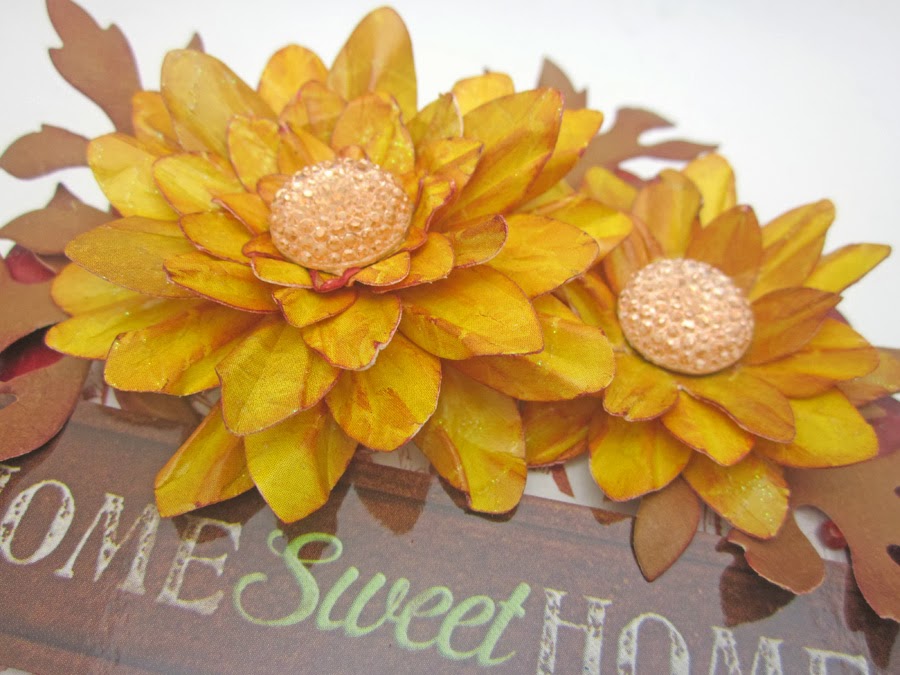
Finish your flower centers with a pearl, rhinestone or in my case I used a KaiserCraft Sparklet. It's whatever you would like.
Here are more pictures of my finished box.


Need supplies? Here is where you can stock up
Xyron 5" Creative Station, Xyron 1.5" Create a Sticker, Xyron 3/16 " Adhesive Dots, Xyron/Teresa Collins Foam Adhesives, Xyron Mega Tape Runner, DCWV The Spiced Cider Stack, Core'dinations Chocolate Stack, Spellbinders, Chipboard, Martha Stewart Punch, Distress Ink / Aged Mahogany, Heartfelt Spellbinders Die, KaiserCraft Rhinestone Strip, KaiserCraft Sparklets


4 comments:
Very Pretty!! And very real looking!
Beautiful, Lori, thanks for the tutorial!
Beautiful project!
What a gorgeous technique! So glad I hopped on over to your blog. Thanks for sharing! -Barb-
Post a Comment